
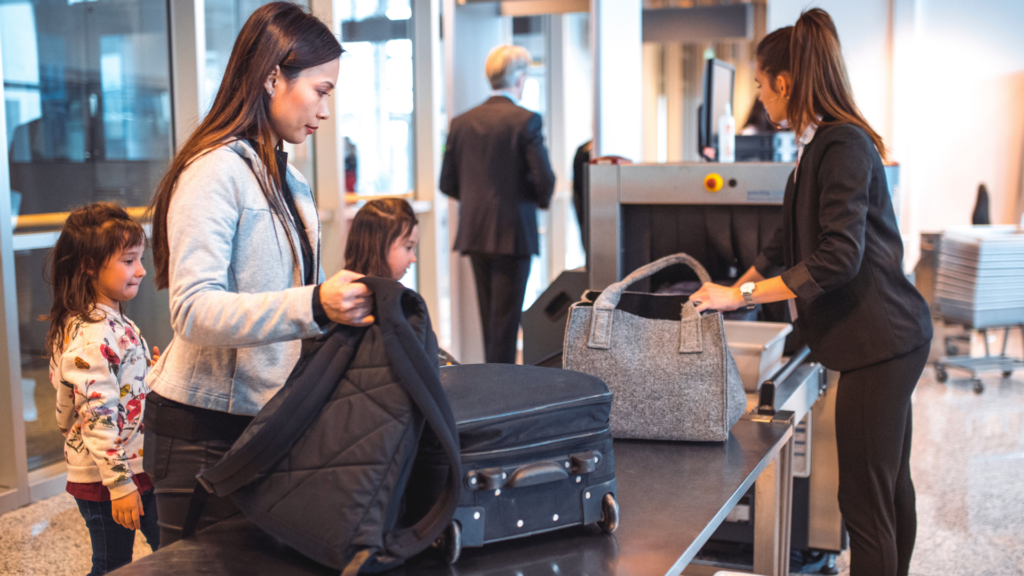
Preparing for airport security can make your travel experience smoother and less stressful. The key is to know what to expect, organise your belongings properly, and follow TSA rules to move through checkpoints efficiently.
Understanding the allowed items, having your documents ready, and wearing easily removable shoes can save time. Small steps like these reduce delays and keep the process straightforward.
By preparing ahead, you avoid common pitfalls that cause long lines and extra screening. This guide will help you navigate airport security with confidence and ease.
Understanding Airport Security Procedures
Airport security involves multiple steps to ensure passenger safety while maintaining efficient flow. It includes detailed screening methods, designated checkpoints, and varying rules between domestic and international flights.
Overview of the Screening Process
The screening process begins with identification verification and boarding pass checks. Passengers place carry-on items into bins for X-ray scanning. Electronics larger than a phone often require separate screening.
Body scanners or metal detectors are used to screen individuals for prohibited items. If an alarm sounds, additional screening such as a pat-down or hand swab for explosives may occur. Liquids are limited to containers of 3.4 ounces (100 millilitres) or less, all placed in a clear, quart-sized bag.
Passengers must follow staff instructions closely and remove shoes, belts, and outerwear as needed. Preparing items in advance speeds up this step.
Key Security Checkpoints
Security checkpoints typically include ID verification, baggage screening, and personal screening. Look for signage instructing passengers to have travel documents ready. Keep electronics easily accessible.
Security officers often ask about the contents of carry-on bags. Carrying forbidden items, like sharp objects or flammable materials, results in confiscation. Items such as laptops or liquids must be screened separately.
Some airports have expedited lanes for frequent travellers with TSA PreCheck or similar programs. These lanes allow keeping shoes on and leaving laptops in bags.
Differences Between Domestic and International Security
International flights generally have stricter screening standards. Customs and immigration checks occur after security, but additional screening may arise before boarding.
Passengers on international flights often face more thorough inspections of electronics and liquids. Some countries enforce specific rules on food or medication transport.
Domestic security focuses primarily on internal safety regulations without customs enforcement. Risk levels and targeted screening may differ based on travel origin and destination.
Understanding these differences helps prepare for varying wait times and documentation requirements.
Essential Documents and Identification
Having the correct documents and identification ready is crucial for a smooth security check. Knowing which papers to bring and how to present them can save time and reduce stress.
Preparing Your Travel Documents
Before heading to the airport, gather all required travel documents in one place. This typically includes your boarding pass and passport or ID. Keep them easily accessible to show security personnel quickly.
Double-check that your name matches exactly on all documents. Mismatched names can lead to delays or denial of boarding. Also, print backup copies of electronic tickets when possible; digital issues can occur.
Organising documents in a travel wallet or folder helps prevent loss or damage. Avoid carrying unnecessary paperwork to speed up the identification process.
Acceptable Forms of Identification
Airports require government-issued identification for all travellers. For domestic flights in the U.S., a state-issued driver’s license or enhanced ID is standard. Passports are required for international travel.
Military ID, permanent resident cards, and trusted traveller cards like Global Entry are also accepted. Expired IDs may not be accepted unless specific TSA exceptions apply.
Children under 18 generally do not need an ID for domestic flights if travelling with an adult. Check airline or security guidelines to confirm any age-specific requirements.
Digital Boarding Passes and Mobile IDs
Digital boarding passes can be scanned directly from your smartphone. Ensure your phone is charged and the boarding pass is downloaded or accessible offline to avoid connectivity issues.
Some airports and airlines accept mobile government IDs through authorised apps. However, digital IDs are not yet widely accepted everywhere, so carry a physical ID as a backup.
Screen brightness and phone screen protectors can affect barcode scanning, so adjust accordingly. Always follow airline instructions regarding digital documents to ensure smooth security checks.
Packing Tips for Security Clearance
Packing efficiently for airport security requires careful organisation, awareness of restricted items, and proper handling of liquids and gels. These factors help speed up the screening process and reduce the chances of delays or confiscations.
Organising Your Carry-On Luggage
To speed up security checks, arrange your carry-on items for easy access. Place electronics such as laptops and tablets in a separate, easily removable compartment. Keep travel documents, boarding passes, and IDs at the top of your bag or in an external pocket.
Use packing cubes or small pouches to separate personal items and avoid clutter. Shoes, jackets, and belts should be easy to remove and stowed in bins when required. Avoid overpacking; security officers may ask to inspect overstuffed bags more thoroughly.
Restricted and Prohibited Items
Knowing what items are not allowed in carry-on luggage prevents delays. Common prohibited items include sharp objects like knives and scissors longer than 4 inches, flammable liquids, and weapons.
Certain sports equipment and tools may be restricted or require checking. Battery-powered devices with lithium batteries must comply with airline regulations regarding size and quantity.
Check the TSA or relevant authority website for the most up-to-date list of banned items before packing.
Tips for Packing Liquids and Gels
Liquids and gels must be in containers of 3.4 ounces (100 millilitres) or less. All containers should fit comfortably in a single, clear, quart-sized zip-top bag.
Each passenger is limited to one of these bags, which must be presented separately at security. Transfer large liquids into travel-sized bottles if needed.
Avoid overfilling containers; spills can lead to additional screening or item disposal. Place the bag on top of your carry-on or in an accessible outer pocket for quick removal.
Navigating the Security Checkpoint
Efficiently moving through airport security requires understanding each step and what is expected. Knowing how to pack and prepare items like electronics, shoes, and outerwear helps avoid delays and ensures a smooth process.
Step-by-Step Walkthrough
Start by having your boarding pass and ID ready for inspection. Place all carry-on bags on the conveyor belt. Remove any items from pockets and place them in a bin.
Walk through the metal detector when directed. If prompted, follow the instructions for additional screening or a pat-down. Collect your belongings as soon as they come out on the other side.
Stay calm and aware of your surroundings. Following these steps precisely reduces wait time and stress.
Handling Electronics and Laptops
Laptops and large electronics must be taken out of their cases and placed in separate bins. Tablets, e-readers, and other devices may need to be removed as well, depending on the airport.
Ensure all cords and accessories are unpacked for better X-ray visibility. Packing electronics at the top of your bag speeds up this process.
To avoid damage, carry delicate electronics in padded cases and handle them carefully when placing items on the belt and retrieving them.
Shoes, Belts, and Outerwear Removal
Most airports require removing shoes and belts before screening. Place these items in bins and avoid metal accessories that slow the process.
Outerwear such as jackets, coats, and heavy sweaters must also be removed. Lighter layers like scarves may stay on, but check specific airport rules.
For convenience, wear slip-on shoes and minimal metal to speed up this stage. Organise your items neatly in bins to keep track of everything.
Expedited Screening Programs
Expedited screening programs offer travellers faster security checkpoints and less hassle. They involve specific applications, eligibility criteria, and distinct benefits that simplify the airport experience.
TSA PreCheck and Global Entry
TSA PreCheck allows eligible travellers to use dedicated lanes at U.S. airports. It speeds up screening by letting passengers keep shoes, belts, and light jackets on and leave laptops and liquids in bags.
Global Entry includes TSA PreCheck but adds expedited customs screening for international arrivals. This program is designed for frequent international travellers entering the United States.
Both programs require background checks and fingerprints. Membership duration is typically five years.
How to Apply for Expedited Options
Applications for TSA PreCheck and Global Entry are submitted online through official government websites. Applicants complete forms and pay fees—$85 for TSA PreCheck and $100 for Global Entry.
Next, applicants schedule in-person interviews at enrollment centres. These involve identity verification and fingerprint collection. Approval can take from a few days to several weeks.
Renewals follow similar steps but may include shorter wait times. Using official sources avoids scams and ensures security.
Program Benefits and Eligibility
Both programs improve travel efficiency but cater to different needs.
| Feature | TSA PreCheck | Global Entry |
| Airports covered | 200+ U.S. airports | U.S. and international entry |
| Screening speed | Faster security lanes | Customs and security expedited |
| Cost | $85 for 5 years | $100 for 5 years |
| Eligibility | U.S. citizens, permanent residents | U.S. citizens, permanent residents, and some foreign nationals |
Applicants must have a clean criminal record and valid identification. Certain offences disqualify candidates. Checking eligibility requirements before applying saves time.
Special Considerations for Families and Individuals with Disabilities
Airport security procedures often require additional planning for families with young children or elderly passengers and individuals with disabilities. Understanding specific policies and available assistance can make the process smoother and less stressful.
Travelling with Children orthe Elderly
Children and elderly passengers may need extra time and patience at security checkpoints. It is helpful to arrive earlier than usual to accommodate any delays.
Tips include:
- Keep essential items like snacks, medications, and entertainment within easy reach.
- Explain security procedures to children beforehand to reduce anxiety.
- Elderly passengers should carry documentation for any medical devices, which may require additional screening.
- Use family lanes where available, which provide a more convenient and less crowded route through security.
Some airports allow strollers and wheelchairs to stay through security or can provide storage during screening.
Assistance for Passengers with Disabilities
Passengers with disabilities can request various forms of help during security screening. Prior notification through the airline or TSA Cares program is recommended for personalised support.
Key points:
- Wheelchairs, service animals, and mobility aids are allowed through security but may be inspected.
- Passengers may opt for private screening, which respects privacy and comfort.
- Operators are trained to assist with medical devices and prosthetics.
- TSA PreCheck is available for eligible travellers with disabilities to reduce wait times.
Clear communication about specific needs before arrival ensuresa smoother passage through security.
After Clearing Security
Once you’ve passed through security, you need to efficiently manage your belongings and navigate the terminal. Staying organised and knowing where to go next saves time and reduces stress.
Repacking and Organising Belongings
Immediately after security, gather all your items from the bins and conveyor belt. Repack liquids, electronics, and loose items into your carry-on carefully to avoid misplacing anything.
Check that your boarding pass, ID, and valuables are easily accessible but secure. Use small pouches or compartments for liquids and electronics to keep items separated and prevent damage.
If you removed your shoes or jacket, put them back on promptly to avoid delays. Confirm nothing was left behind in the trays. Keeping your bag organised at this stage helps with smooth boarding later.
Finding Your Gate Efficiently
Locate your gate by checking the flight information displays right after security or on your airline’s app. Pay attention to gate numbers and any last-minute changes.
Follow airport signs and consider the walking distance to your gate. Larger terminals often require shuttle trains or trams; locate these transportation services early.
Allow extra time for amenities like restrooms, food, or duty-free if needed, but keep track of boarding times. Arriving at your gate early reduces last-minute rushing.
Additional Tips for a Smooth Experience
Timing your arrival and maintaining composure throughout security are crucial. Being strategic about when you show up and how you handle the process can reduce stress and delays.
Best Times to Arrive at the Airport
Aim to arrive 2 hours before domestic flights and 3 hours before international flights. These are standard recommendations that account for check-in, security, and unexpected delays.
Early mornings and late evenings usually have fewer travellers, which can shorten wait times. Avoid midday or late afternoon when flights are most frequent.
Check airport and airline websites for live security wait times. Some airports provide real-time updates that help plan your arrival more efficiently.
Staying Calm and Prepared
Have your boarding pass and ID ready before reaching the security checkpoint. This speeds up the line and reduces frustration.
Wear easily removable shoes and limit accessories like belts or jewellery that need to come off. This helps avoid unnecessary delays.
Deep breaths and a patient mindset lower stress. Remember, security staff follow strict procedures aimed at safety, not to hinder passengers.
Follow instructions clearly and promptly. Cooperation leads to a faster, smoother experience for everyone.